Introduction:
Creating 2D Animation using free and Opensource tool is a rewarding skill for those who wish to become Graphic Designer or a Digital Artist, especially the investment is only a computer and an operating system of your choice and the software part is completely free. With the Free and Open Source Software(FOSS) Movement, great number of software have been developed by communities, and are given to people at no cost. And in this post I would like to introduce Pencil 2D, which is simple and easy to use 2D animation tool.
Pencil 2D:
Pencil 2D is a free 2D animation software, aimed at beginners. It has a very small learning curve, so it is ideal for any beginner. Where the user only focuses on the design part, rather than worrying about implementation.
Interface:
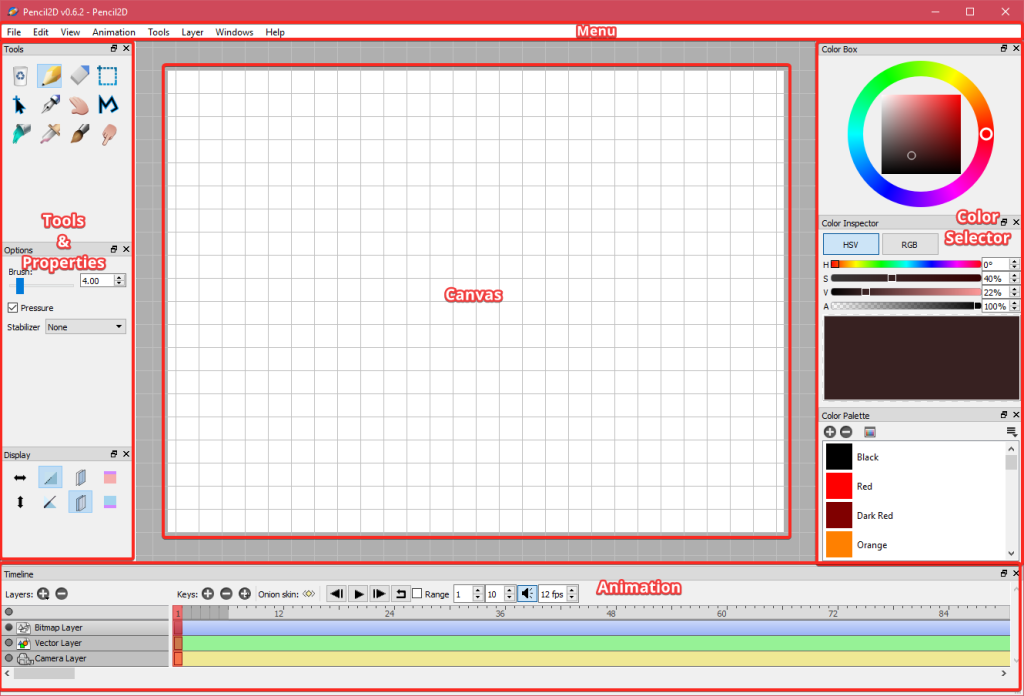
Pencil 2D’s interface is broken down into 5 main areas. The main area we focus on are the canvas area where we define the animation stage, and the Timeline section where we define the animation.
- Menu contains the usual options
- Canvas is the part that is going to be focused by the camera. And entire area surrounding the canvas is the stage.
- Tools & Properties is where we select the tools and set its properties, like when we select brush, we get to set its property of brush size to be higher or lower using the property section.
- Color Selector in this section, there is the color wheel, along with manual color setting option and a color palette. Which will aid in selecting and blending colors.
- Animation section is where we bring instruct when the object in the canvas area be articulating. Remember Pencil 2d is used for only simple Timeline or Key-Frame Animation.
Tutorial: Back to School Greetings
Here we are going to create a simple Back-to-School sliding animation. The resource file are available as zip format, having the source image and generated GIF in the link.
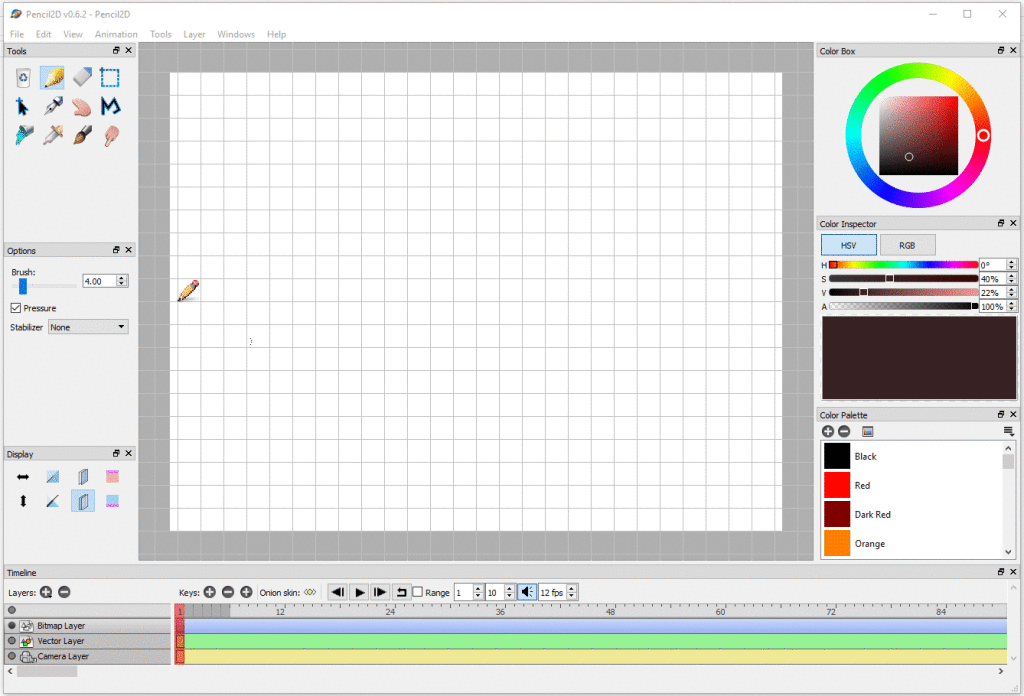
Step 1: Open Pencil2D and import image using file > import >image.
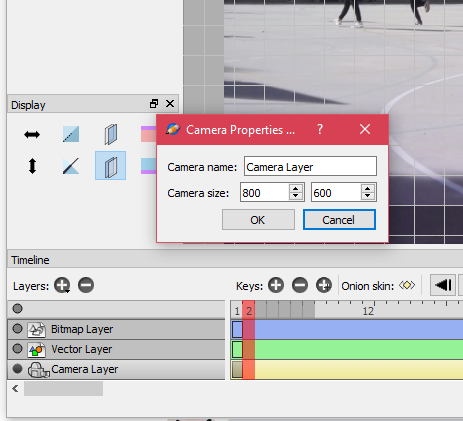
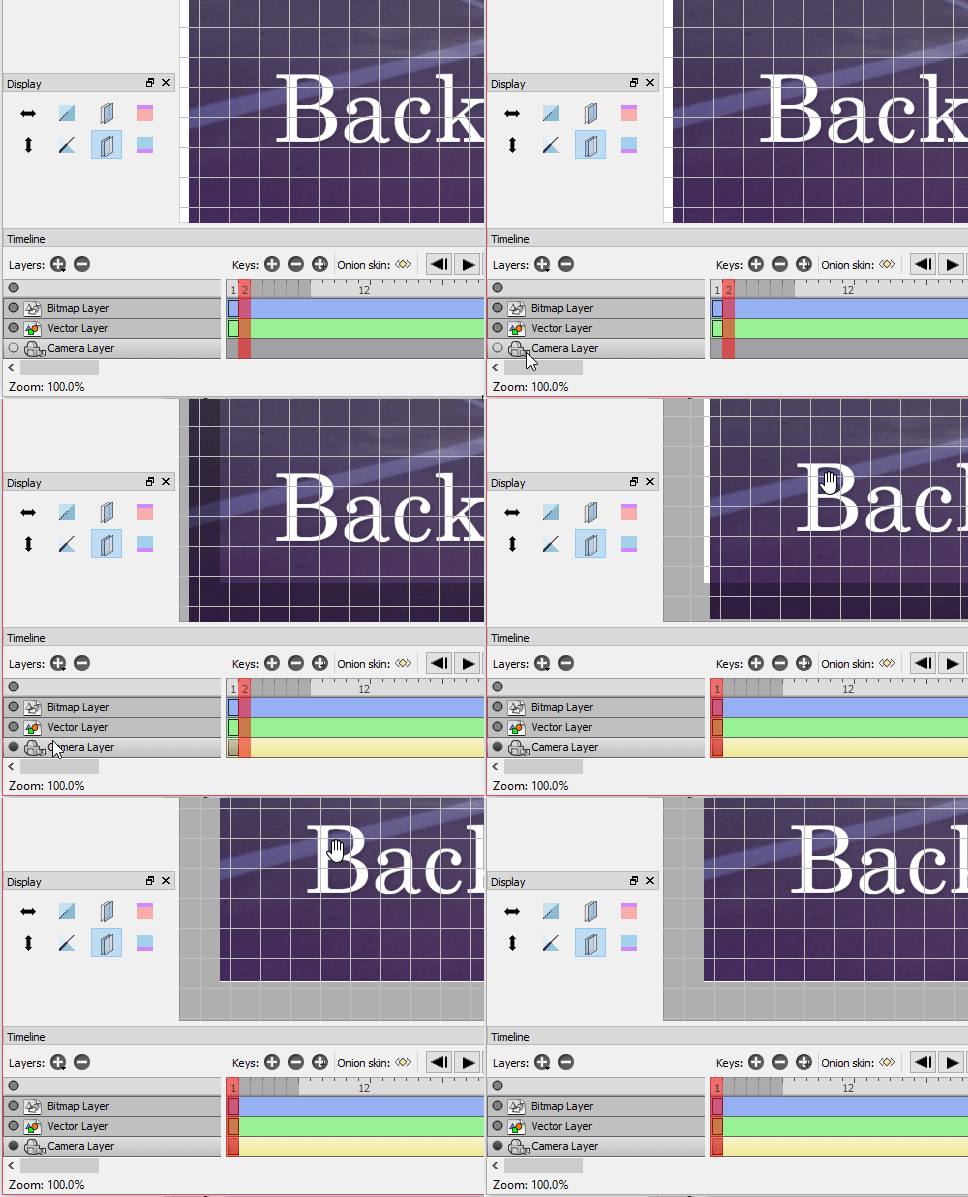
Step 2: In order to resize the canvas/stage size, double click the camera layer . Enter the size of height and width in pixel unit.
Step 3: In order to arrange the image on screen select the camera layer, and in the tools section select hand tool. Now cursor turns to hand symbol, place it on the image and drag.
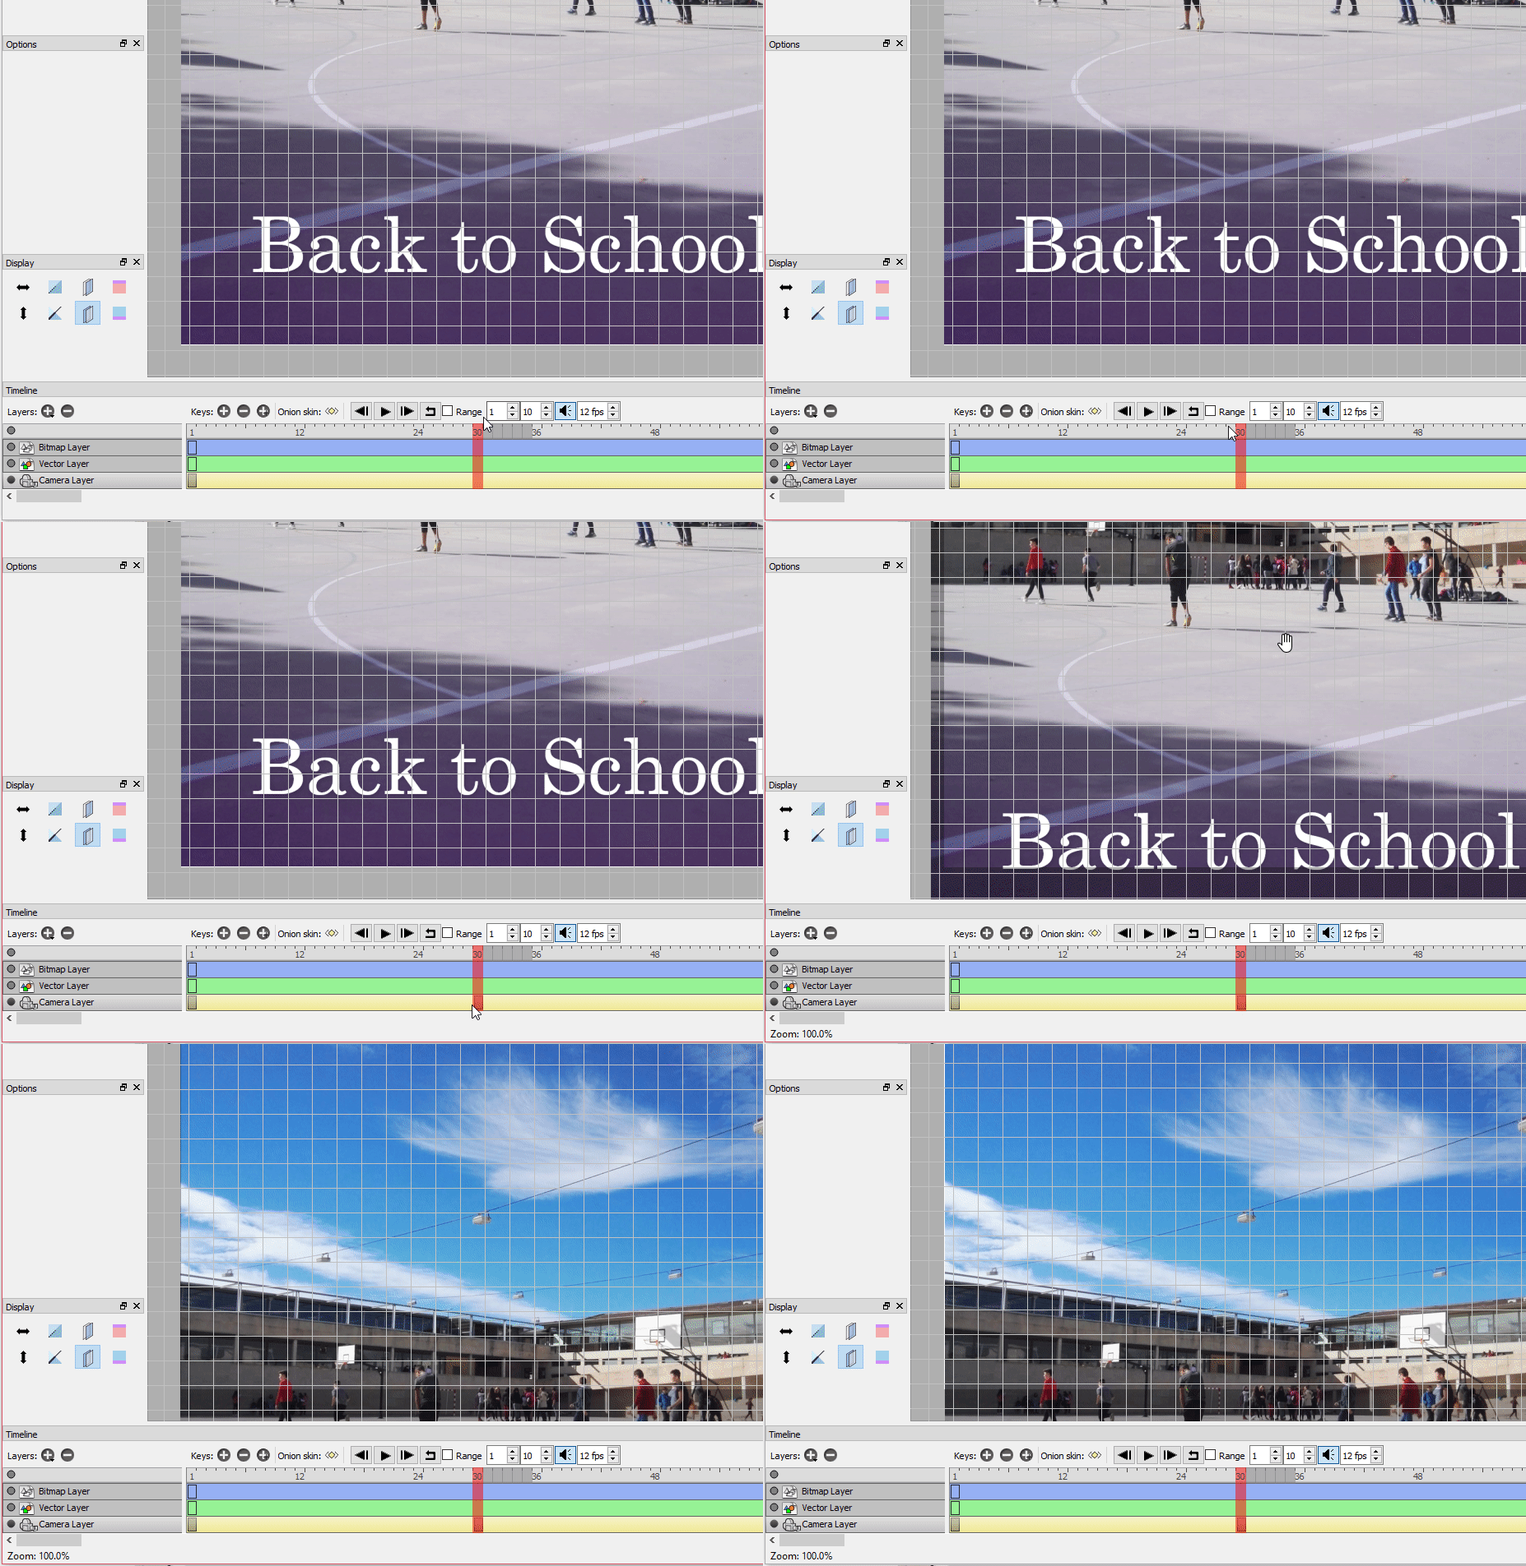
Step 4: In order to animate using timeline, in the camera layer timeline, select the 30th frame and add frame using the [+]keys located in timeline window to create a new frame.
Step 5: Select the image and drag it to a different part of the camera area(Refer the gif).
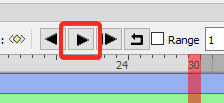
Step 6: In order to preview the animation, press the play button in the timeline section.
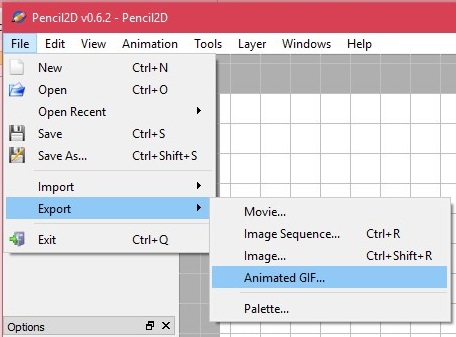
Step 7: This is the final step where we export the image to either GIF, Video, Sequence Images. Go to file>export>animated GIF(we used GIF format in order to be used in Web).
Output:
Further Reading:
Pencil 2D is a simple tool with a lot of potential, and is best suited for introducing students, beginners not only to Computer Graphics & Animation but also to FOSS and its importance. In this short and simple tutorial only the basics are covered. And the advance part is omitted since it is out of scope of this tutorial, where the importance are given to the introduction of Pencil 2D and animation concepts. For further information regarding the terminologies and advanced concepts please refer the below sites for information.
Links:
- https://www.pencil2d.org
- https://www.adobe.com/devnet/flash/learning_guide/animation/part03.html
- https://www.adobe.com/devnet/archive/flash/articles/concept_tween.html
Latest posts by ShriHariRam G (see all)
- FOSS Tools - Animation using Pencil2D - March 9, 2022
- Web Development Using Chrome Extensions For Smart Schools! - December 8, 2022
- STEM Education, The learning Revolution – An Explanation with Examples! - June 27, 2022
